How to Build a Content Calendar With Feedly, Trello, and Zapier
In a previous post, I recommended that writers integrate apps to improve their overall workflow. Setting this up is a highly individual process. What one writer finds to be *chef’s kiss* might make another writer want to burn the house down as though it were infested with spiders. What I’ve found helpful, however, is to build a way to funnel curated content and original ideas into one location, all organized by where they are going to publish and the categories they are going to fall into. To do that, I use a combination of Feedly Pro (paid service), Trello Premium (paid service), and Zapier (free version). Once you’ve created accounts with those three services, follow the steps below to create your own personalized content calendar.
Set up Feedly
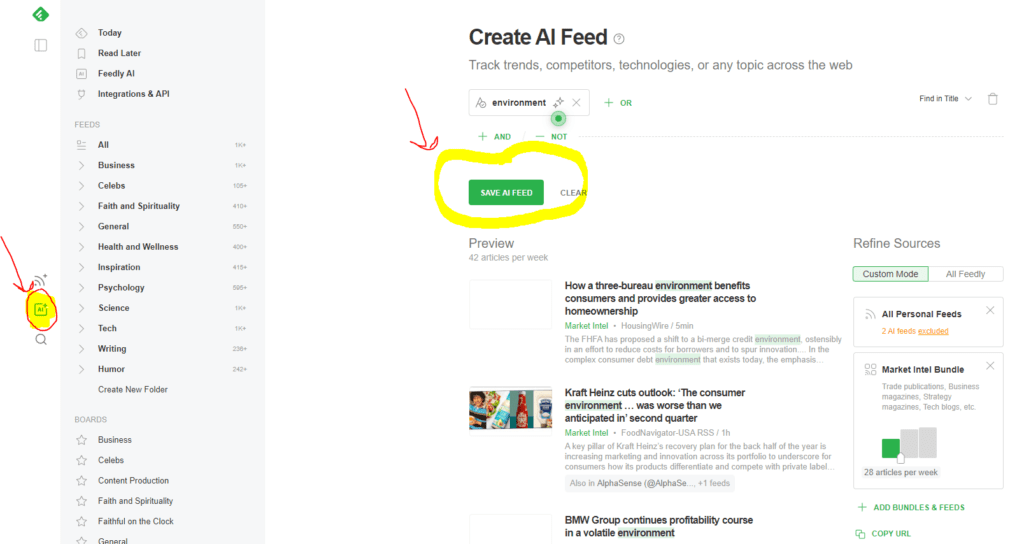
Tell Feedly to listen to specific keywords, topics, or phrases you’re interested in finding by creating AI feeds. Click on the AI feed icon on the left. Then type whatever you want to find. Here, I’ve used “environment” as my keyword. Click “Save AI Feed.” You then can create folders to group AI feeds under larger umbrella topics if you like. For example, if you want information on climate change, you might have “Climate Change” as the folder and then add keywords like “ocean temperature” or “severe weather.”

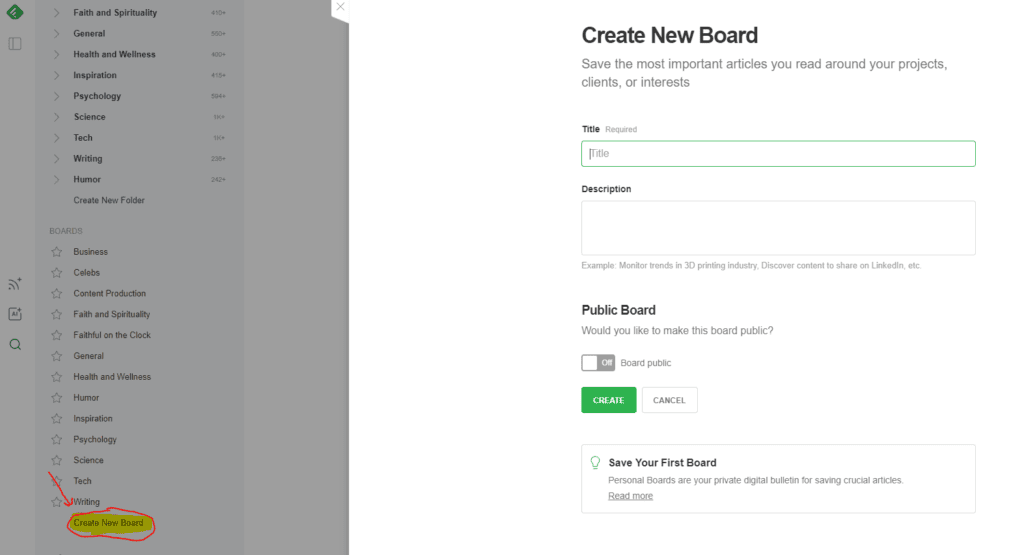
Create boards for each topic you want to create content about. Have these mirror your AI feed folders.
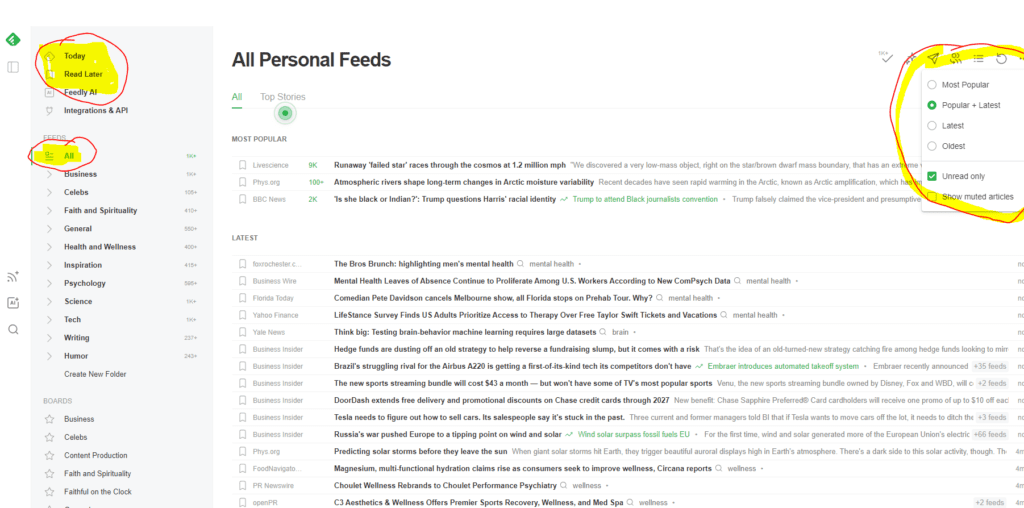
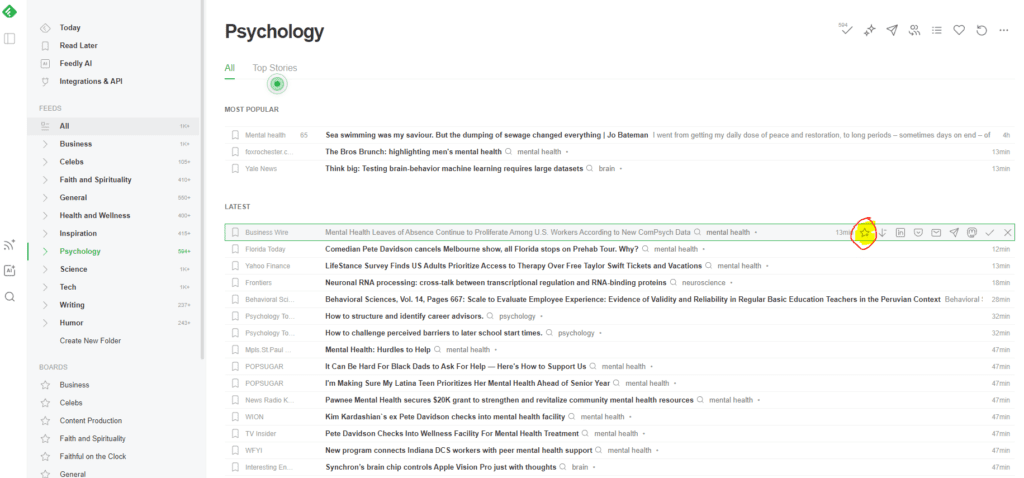
Sort and curate your feeds. You can see everything Feedly is pulling based on all your keywords, phrases, etc. by clicking “All” under “Feeds” on the left. But you also can click each of the folders or specific keywords you’ve created feeds for to see what Feedly has found only in that selected category. You can click “Today” to find content only from the current date or “Read Later” to review content you’ve already saved.
To change how Feedly displays what it’s finding in the feed, click the 3 dots in the upper right and select your preferences. I like using “Popular + Latest” because it prioritizes what’s getting the highest click response from within the most current content.
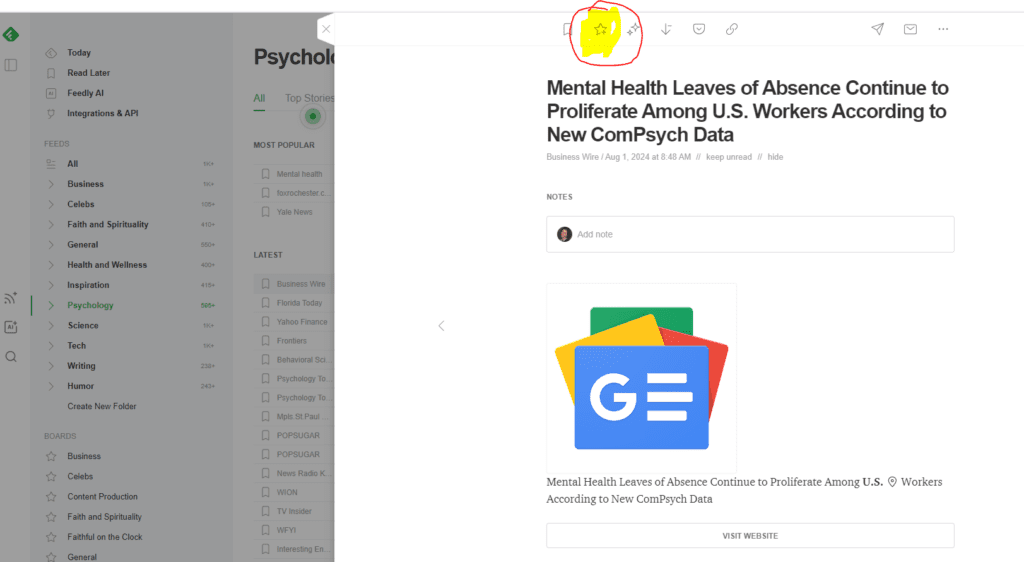
Find and save content you like. When you find a headline that interests you, click the star icon and save it to the appropriate board. You can also save an article once you click into it to read. The “Save to Board” star will be at the top of the article once you click the headline from the main feed results.
Set up Trello
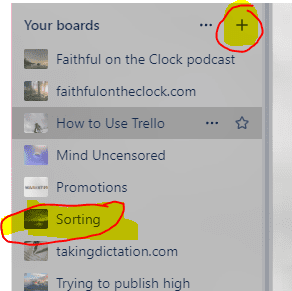
Create your boards. Start by clicking the + sign by “Your Boards” on the left to create a “Sorting” board. (You can name this board whatever is easy to remember, but it’s just a board where you can dump all the content and ideas you haven’t assigned to specific publication areas yet.)

Name your new board by clicking in the title field and typing the folder name.
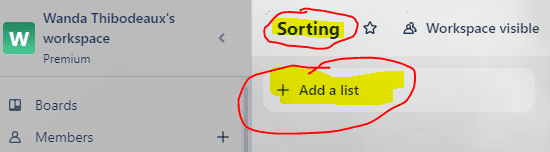
Click “Add a list” to create topic category lists. Create a list for each folder in your Feedly account. For instance, I have inspiration and humor feed folders in Feedly, so I’d create inspiration and humor lists in Trello.
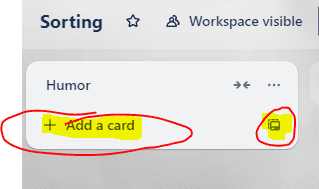
Add a card to your new list manually when you have an independent content idea by clicking “Add a card.” Fill out whatever information you need, such as the card title and a short description. If you’re a visual person, adding covers to each card can be a fantastic way to find the card you need quickly. I HIGHLY recommend clicking the template icon and creating some templates (e.g., blog, video, etc.) down the line to save yourself time (more details below).
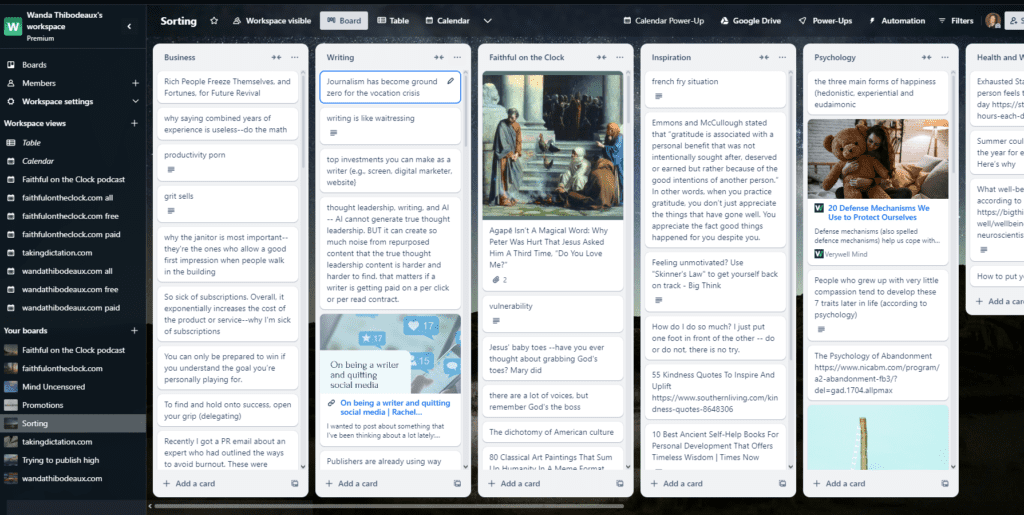
Here, you can see what my sorting board looks like with content aggregated from Feedly or manually added.
Create a board for each place you want to publish. If you look at the screenshot from the “create boards” step above, you’ll see I’ve got separate boards for my podcast, websites, Mind Uncensored LinkedIn newsletter, etc. For each publication board, create category lists that mirror the organization for that publication. For instance, on my faithfulontheclock.com website, I have categories that help filter whether the content is accessible to unpaid or paid users (e.g., Previously Published Articles, Exclusive Audio). So, I have lists for each of those categories on the faithfulontheclock.com Trello board.
Connect Feedly and Trello using Zapier
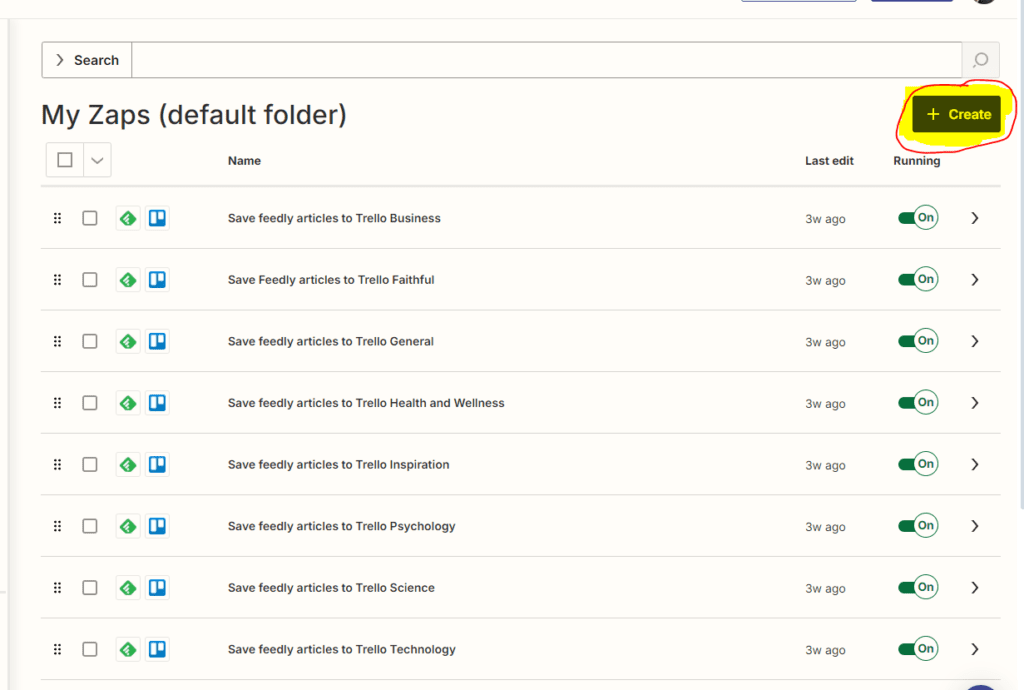
Log in to your Feedly, Trello, and Zapier accounts. Then, on your main Zapier dashboard, click “Create” and select “New Zap.”

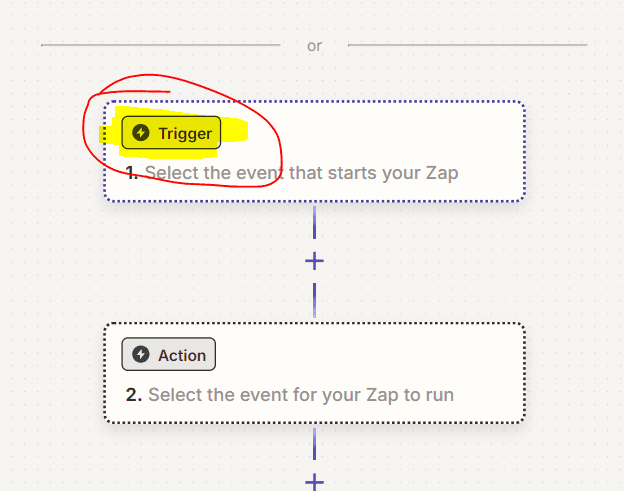
Click “Trigger” to select the event that starts your Zap.
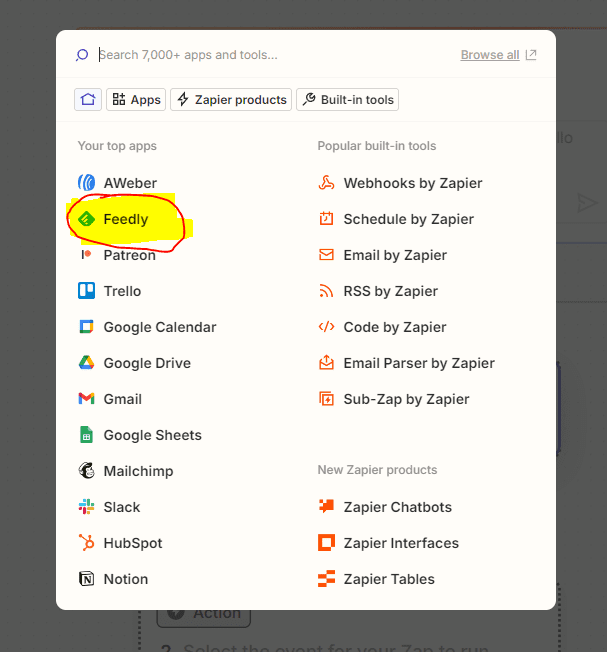
Select Feedly as the app that will trigger the Zap. If you haven’t connected Feedly and Zapier before, you’ll need to authorize the connection.
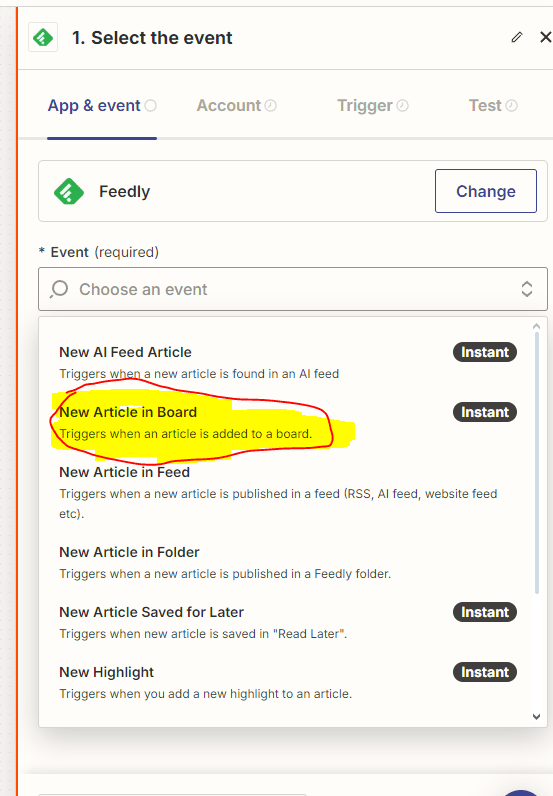
Once your Feedly app is set as the trigger, click the “Trigger” option button again. A new menu will open on the right that will allow you to finish setting the details for the trigger. You should be in the “App & event” section by default. From the event dropdown menu, select “New Article in Board.”
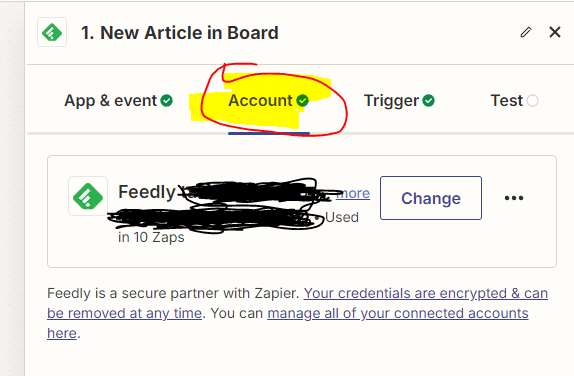
Click on “Account.” Note that, if you later create more Zaps and want to use a different Feedly account for them for some reason, you can select that account by clicking “Change” and adding the other Feedly account. But otherwise, simply click the “Continue” button at the bottom. My account info is conveniently scribbled out in the screenshot below ( 🙂 ) but you should see the email address for your Feedly account here.
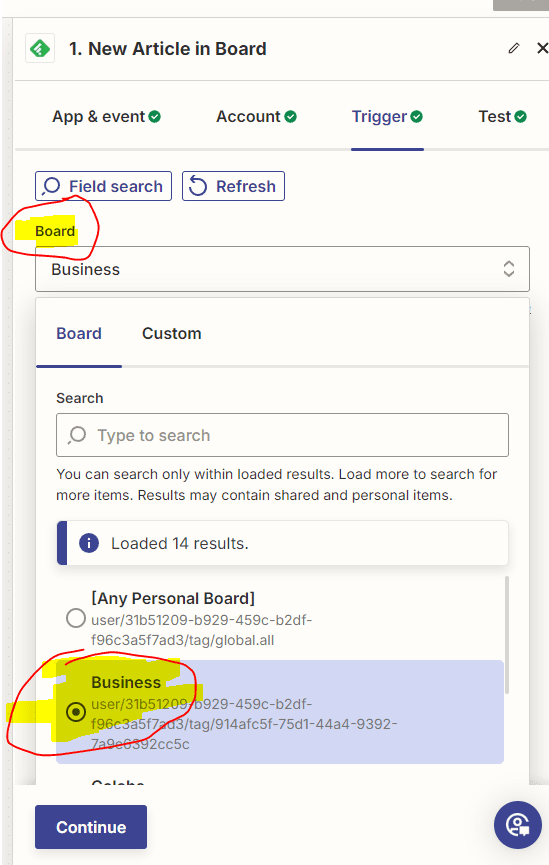
Click over to the “Trigger” section. Choose the Feedly board you want Zapier to pull from for the Zap. Here, I’m having Zapier pull from my “Business” board. Click “Continue.”
Click over to “Test” and click “Test Trigger.”

Select any of the recent records Zapier finds in your Feedly account. Click “Continue with selected record.” This simply chooses a piece of content from Feedly that Zapier can use to test your connections in the next steps.

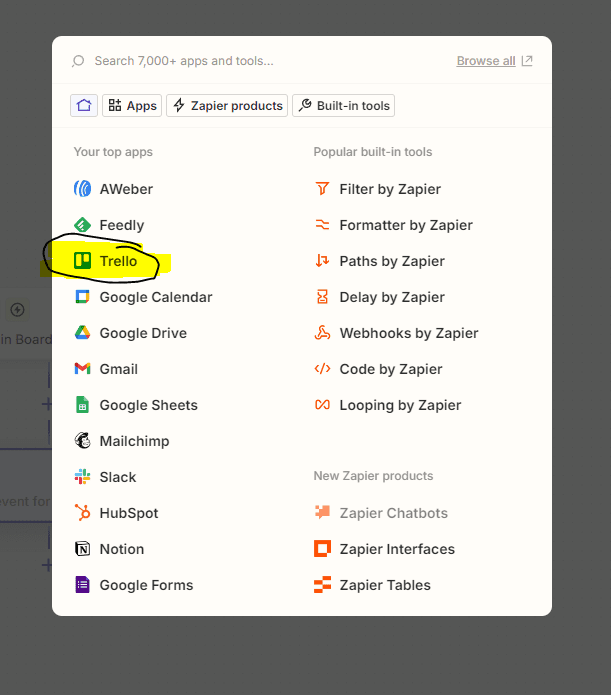
Select Trello as your event app for your Zap. If you haven’t connected Trello and Zapier before, you’ll need to authorize the connection.
A menu will open again on the right so you can add the details for the Zap event. Under the “Event” dropdown, select “Create Card.” Then choose “Continue.”

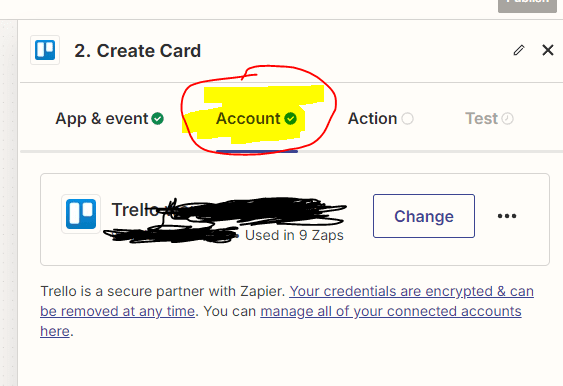
As with Feedly, you can opt to use different Trello accounts for different Zaps if you like.
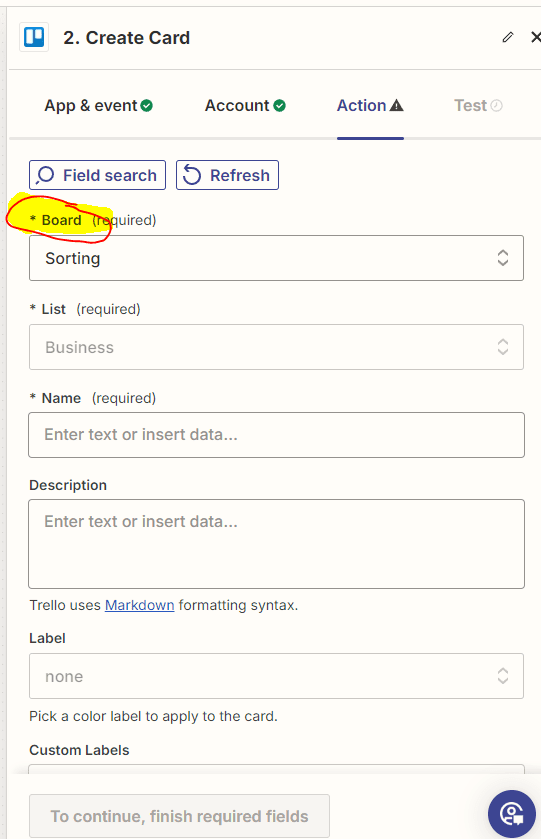
Under the “Action” section, use the Board dropdown menu to pick which board you want Zapier to put the Feedly record on. Choose the “Sorting” board.
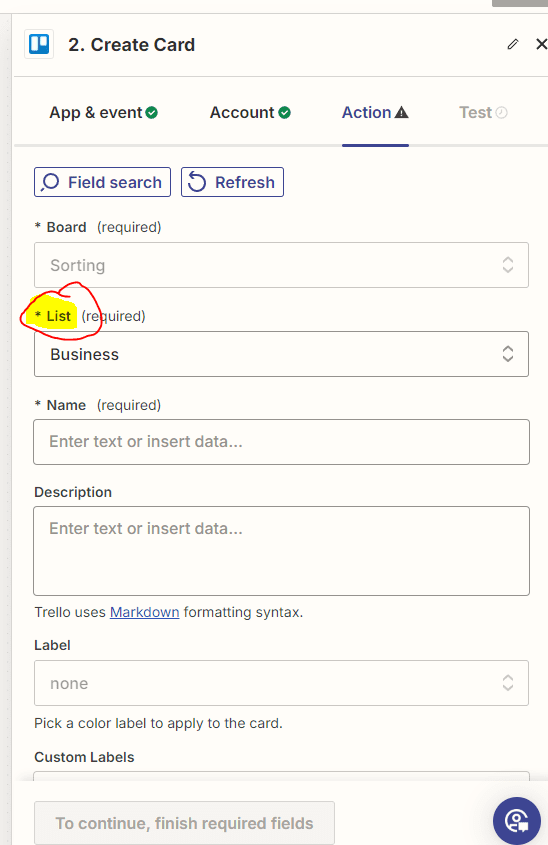
Choose the list you want Zapier to put the Feedly card on. In this example, I’m using my “Business” list on the “Sorting” board, because I’m pulling content from the Business Feedly folder.
Click into the Name field. The 3 test records from earlier will populate. You can choose the test record you opted for earlier, or you can type in a name of your own. I use the test record here. Click “Continue.”

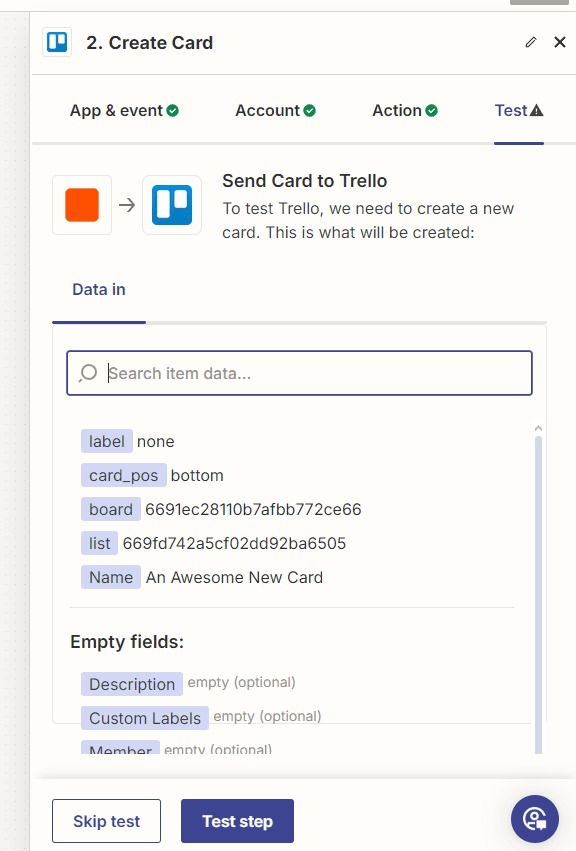
Now you can test the Zap connection. If everything is working properly, Zapier should create a new card from the Feedly test article on the list you’ve selected on your “Sorting” board.
Now, if you go back to the screenshot for the first Trello step, you’ll see I’ve created Zaps for every single Feedly folder, each of which has its own corresponding list on the Trello “Sorting” board. If you take the time to do this, Zapier will create organized cards every time you save and sort ANYTHING to your Feedly.
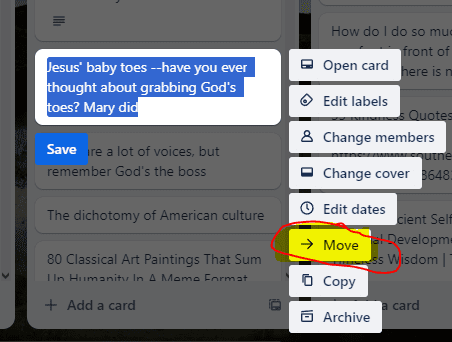
After you’ve gotten all of this set up, whenever you need to put something on the content calendar, go to your “Sorting” board in Trello. Click on whatever content card you’d like to schedule. Then click “Move.” (You can also access “Move” by clicking the 3 dots on the card.)
Choose the board for whatever publication you want to assign the card content to. Select the list you want for the card to assign a content category. Trello will default to putting the card in the bottom position in the list. But you can place it anywhere in the list using the position dropdown menu. Click “Move.” Here, I’m assigning a card to my faithfulontheclock.com website under the Social Media Thoughts and Musings category list.

Using Calendar views
Trello provides a content Calendar view for Premium users that’s quite handy. The main content Calendar view, which you’ll find on the left of the Trello Workspace, will show any card you’ve created that has an assigned due date. The content Calendar view within each board, however, will show you both cards and tasks that have a due date.
You can create separate Calendars using filters for different needs, such as if I needed to see my takingdictation.com and wandathibodeaux.com websites together. When you are in the main Calendar view, you’ll see “Filters” on the right side of your screen, near the top. Click that and set whatever parameters you’d like, and then save your settings as a new content Calendar view. The new view should appear under the main Calendar button on the left in your Workspace. You can create as many content Calendar views and boards as you need under Trello’s Premium version. So, this Feedly-Trello-Zapier integration truly can let you track every single client or personal content project you have in one place.
Save more time building your content calendar with templates
Once you have some content assigned to your publications and have set the appropriate due dates, you’ll be able to see the content in your calendar(s). I created color-coded labels that allow me to see from the calendar which publication a card is from and whether it’s done. As a result, I can very easily see where and when things publish. I also can see what the status is for each piece of content and all tasks related to it.
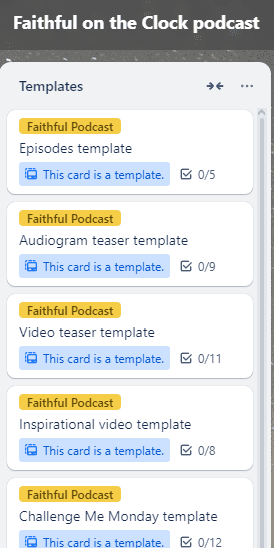
Creating templates for your publication boards is an optional step. But if you create templates for your each publication board, you can save yourself tons of time building your calendar. A template can hold specific checklists and labels, as well as other information. Here, you can see some of the templates I have for my podcast, Faithful on the Clock.
With your templates set up, look at your publication boards and find a card you want to schedule. At the bottom of whatever list the card is in, you’ll see an “Add a card” option with a little template icon on the right. Click the template icon and select the template you’d like to use. Then name and add the card you’ve created from the template. Now, copy the information from the card you want to schedule to the new card you made from the template. Delete the source card once you’ve copied everything so you don’t have a duplicate of the same content.
This step is admittedly a little clunky. There’s no built-in option to transform an existing card into an existing template framework. But if your templates have a lot of components, copying and pasting the information from an existing content card into a template still can save you time once you’ve decided exactly where to assign the content. Trello does offer a way to create automation and button rules, code free. So, there might be a way to use those rules to streamline the card conversion process. Buuuuuut I haven’t explore that enough yet. 🙂

Huzzah! Now THAT’S content organization.